
Your first app
In this tutorial you build a todo list: you can add items, tick them off, see how many are left, and filter the list. Along the way you meet most of what makes Tessel apps work: structs, state, controls, loops, your own views, bindings and enums.
This is where you’ll end up:
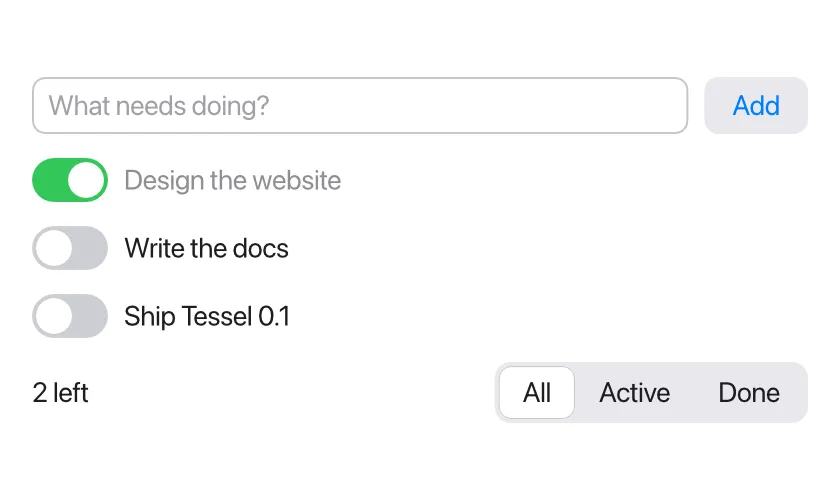
You need a working tessel command; see Installation.
The finished program is also in the Tessel repository as examples/todos.
Set up
Section titled “Set up”A Tessel program is a folder of .tsl files. Make a folder called todos
with an empty file main.tsl in it. You can edit it in any text editor, in
the Tessel IDE (run tessel ide todos), or in
VS Code.
After each step, check your program and run it:
tessel check todostessel run todostessel check only looks for mistakes, which is quick. tessel run compiles
the program and opens its window. Close the window to get back to the
terminal.
Step 1: a struct and a list
Section titled “Step 1: a struct and a list”A todo has a title and is either done or not. Describe that with a struct, then show a list of todos in an app:
struct Todo {    title: String    done: Bool = false}
app Todos(width: 420, height: 560) {    state todos = [        Todo(title: "Buy milk"),        Todo(title: "Walk the dog", done: true),    ]
    VStack(spacing: 12) {        for todo in todos {            Text(todo.title)        }    }    .padding(16)}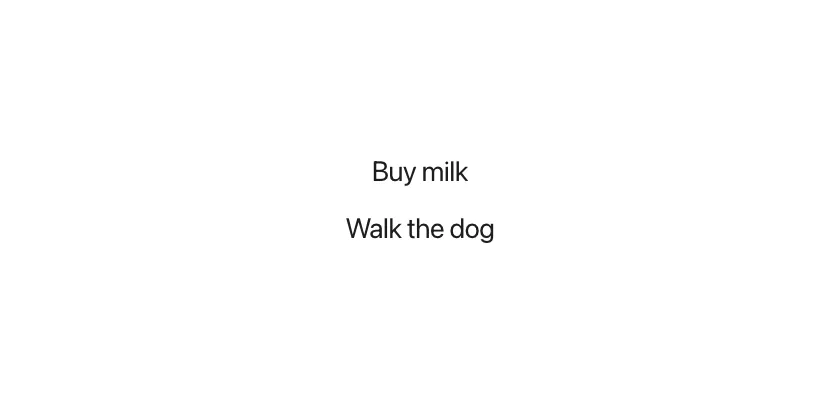
Here is what’s going on:
struct Tododeclares a new type with two fields.donehas a default value, so you can leave it out:Todo(title: "Buy milk")makes a todo that isn’t done yet.app Todos(width: 420, height: 560)is the program’s entry point. It opens a window of that size, and its body describes what’s in the window.state todos = [...]is a list of todos that belongs to the app. Its type,[Todo](a list ofTodo), is worked out from the value.VStackstacks views vertically, 12 points apart.forinside a view makes oneTextper todo..padding(16)is a modifier: it adds space around the stack.
Step 2: adding todos
Section titled “Step 2: adding todos”Now let the user type in new todos. Start the list empty and add a text field and a button:
struct Todo {    title: String    done: Bool = false}
app Todos(width: 420, height: 560) {    state todos: [Todo] = []    state draft = ""
    VStack(spacing: 12) {        HStack(spacing: 8) {            TextField("What needs doing?", text: draft)            Button("Add") { add() }        }
        for todo in todos {            Text(todo.title)        }    }    .padding(16)
    fn add() {        if draft != "" {            todos.append(Todo(title: draft))            draft = ""        }    }}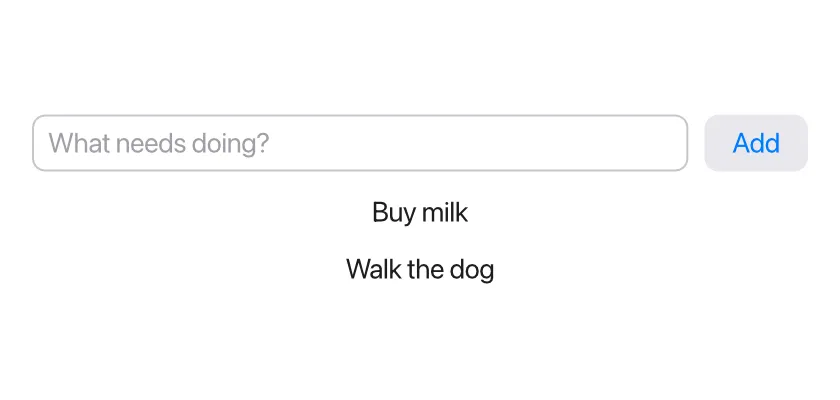
- An empty list has no items to guess its type from, so you write the type:
state todos: [Todo] = []. state draft = ""holds the text being typed.TextField("What needs doing?", text: draft)shows a text field. Itstext:parameter is a binding: the field doesn’t get a copy ofdraft, it reads and writesdraftitself. As you type,draftchanges.Button("Add") { add() }runs the block when it’s clicked. The block after the call is the button’s action.fn add()is a function inside the app, so it can change the app’s state. It appends a new todo and clears the text field (settingdraftto""empties the field, because the field showsdraft).
Every time an action changes state, Tessel rebuilds the view and redraws
what changed. That is why the new todo appears without you writing any code
to show it.
Step 3: a view of your own
Section titled “Step 3: a view of your own”Each todo should get a toggle to mark it done. You could write that inside
the for loop, but it’s neater as a separate, reusable view. Add this
at the end of the file:
view TodoRow(todo: bind Todo) { HStack(spacing: 8) { Toggle(isOn: todo.done) Text(todo.title) .color(if todo.done { .gray } else { .primary }) Spacer() }}and use it in the loop, instead of Text(todo.title):
for todo in todos { TodoRow(todo: todo) }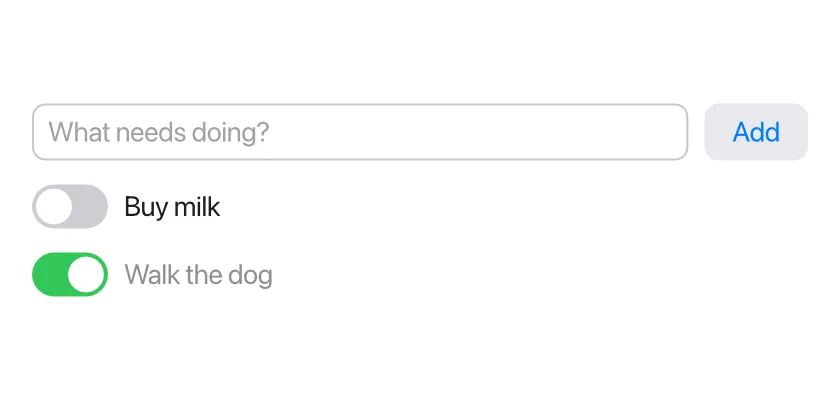
view TodoRow(todo: bind Todo)declares a view with one parameter. The wordbindmeans the row doesn’t get a copy of the todo; it gets access to the caller’s todo, so it can change it.Toggle(isOn: todo.done)binds the toggle to thedonefield. Clicking the toggle changes the todo inside the app’stodoslist..color(if todo.done { .gray } else { .primary })greys out finished todos.ifis an expression here: it picks one of two colors.Spacer()takes up the rest of the row, which pushes the toggle and text to the left.
Notice that the call TodoRow(todo: todo) has no special marker for passing
a binding. Because the loop runs over a state list, each todo is a place
that can be changed, and that’s all a bind parameter needs. If you pass
something that can’t be changed, tessel check tells you. For example,
TodoRow(todo: Todo(title: "Hi")) gives:
error: `TodoRow`'s `todo:` needs something it can change --> todos/main.tsl:17:27 |17 | TodoRow(todo: Todo(title: "Hi")) | ^^^^^^^^^^^^^^^^^ this is a value, not a variable | = help: pass a `state` or `var`, or a field of oneStep 4: counting what’s left
Section titled “Step 4: counting what’s left”Show how many todos are still to do. Add a function to the app that counts them:
fn remaining() -> Int { todos.filter { t in !t.done }.count }and a Text at the bottom of the VStack that uses it:
Text("{remaining()} left")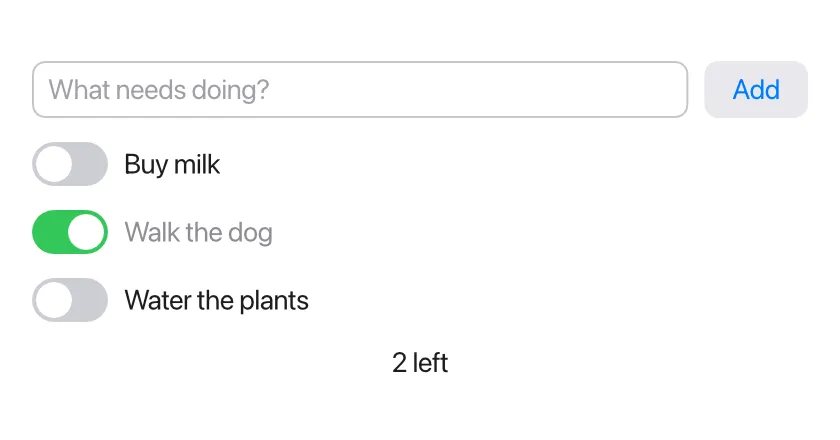
-> Intsays the function returns anInt. The last expression in its body is the result, so there’s no need forreturn.todos.filter { t in !t.done }makes a new list with only the todos that aren’t done. The part in braces is a closure: a small function that takestand returns whether to keep it.!means “not”."{remaining()} left"puts a value into text. Anything inside{ }in a string is evaluated and inserted.
Because the text calls remaining() each time the view is rebuilt, the
count is always right: tick a todo, and it goes down.
Step 5: filtering with an enum
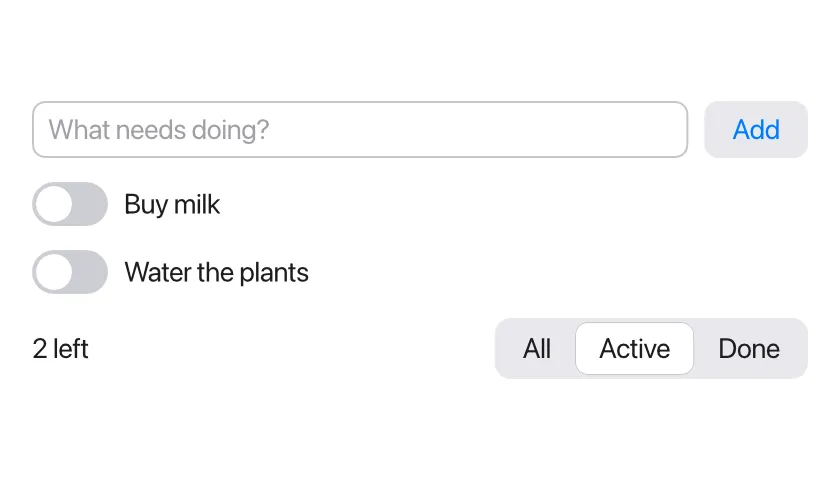
Section titled “Step 5: filtering with an enum”Last, let the user choose to see all todos, only the active ones, or only the done ones. The three choices are an enum:
enum Filter { all, active, done }Store the current choice in the app, as state filter = Filter.all, and
replace the Text from step 4 with a row that also has a Picker:
HStack { Text("{remaining()} left") Spacer() Picker(selection: filter) { Text("All").tag(.all) Text("Active").tag(.active) Text("Done").tag(.done) } }The picker shows its options side by side. Each option has a .tag: the
value that filter gets when you click it. Since Tessel knows filter is a
Filter, you can write .all instead of Filter.all.
To use the filter, add a function that decides whether to show a todo, and
wrap the row in an if:
for todo in todos { if shows(todo) { TodoRow(todo: todo) } } fn shows(todo: Todo) -> Bool { match filter { .all -> true .active -> !todo.done .done -> todo.done } }match picks the branch for the current value of filter. It must cover
every case of the enum; if you add a fourth filter later, tessel check
reminds you to handle it here.
The whole program
Section titled “The whole program”Here is the finished app, the same as examples/todos in the repository:
// A todo list: structs, lists, enums, loops, bindings and custom views.
struct Todo {    title: String    done: Bool = false}
enum Filter { all, active, done }
app Todos(width: 420, height: 560) {    state todos: [Todo] = []    state draft = ""    state filter = Filter.all
    VStack(spacing: 12) {        HStack(spacing: 8) {            TextField("What needs doing?", text: draft)            Button("Add") { add() }        }
        for todo in todos {            if shows(todo) {                TodoRow(todo: todo)            }        }
        HStack {            Text("{remaining()} left")            Spacer()            Picker(selection: filter) {                Text("All").tag(.all)                Text("Active").tag(.active)                Text("Done").tag(.done)            }        }    }    .padding(16)
    fn add() {        if draft != "" {            todos.append(Todo(title: draft))            draft = ""        }    }
    fn shows(todo: Todo) -> Bool {        match filter {            .all -> true            .active -> !todo.done            .done -> todo.done        }    }
    fn remaining() -> Int {        todos.filter { t in !t.done }.count    }}
// A reusable view. `bind` means the row edits the caller's Todo in place.view TodoRow(todo: bind Todo) {    HStack(spacing: 8) {        Toggle(isOn: todo.done)        Text(todo.title)            .color(if todo.done { .gray } else { .primary })        Spacer()    }}
Make it an app
Section titled “Make it an app”tessel run builds a temporary program each time. To get an app you can
keep, use tessel build:
tessel build todos -o todos-app --bundleOn macOS this makes Todos.app, named after your app, which you can
double-click or move to your Applications folder. On Windows it makes
todos-app.exe, which you can double-click too. See
Command line for the details.
Where to go next
Section titled “Where to go next”- The language pages explain each feature in more depth, starting with the basics.
- State and bindings covers
stateandbindfully. - Controls lists the other built-in controls.
- Lists and identity explains
.id, which keeps each row’s own state attached to the right item when a list is reordered.